Saturday, December 31, 2011

Celebrating 100 Days!

It's New Year's Eve but more importantly, it's my niece's 100 day party! 

Source

In the Korean culture the 100th day (baek-il) of a baby's life is celebrated with family and friends. It's an old tradition that we still carry with us today. I was always told we celebrate it because back in the day during war time, babies often didn't survive. For the first 99 days, the survival of the baby was always uncertain but once it reached 100 days, the likelihood that the baby would survive and thrive was solidified.


But... I looked it up and Wiki is telling me a different story. One that is full of superstition and worshiping a false god. The Korean culture, as with many Asian cultures, has a lot of superstitious beliefs so this doesn't surprise me. My family is not superstitious and I believe in God, not some birth goddess so I'm going to chose to celebrate it in my own way and simply treat it as an excuse to eat some cake and celebrate the life of my little niece with friends and family.


I made some DIY decor for the party which I'll post soon!


Oh and Happy New Year! 


This picture reminds me of the one and only time I've been to Hawaii...

So long 2011. Hello 2012!

Friday, December 30, 2011

Old Cabinet Turned New!

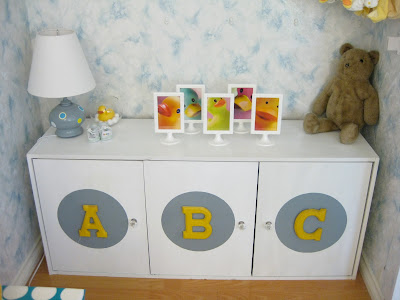
This cabinet I refinished for my sister's nursery used to be a busted up, ratty old cabinet that my mom had stored in her garage for about 10 years. It was first purchased at Ikea from the As Is department. It's supposed to be kitchen cabinets. 


My mom bought another set and stacked them on top of each other and used it as a make shift pantry in our small kitchen.


Life: Designed


In the last 10 years, we've moved 5 times and this poor cabinet has been dragged along with us not doing much other than sitting in the garage. 


This summer when I was "shopping" in the garage for furniture for my sister's nursery, I found it all banged up.


Life: Designed
This picture doesn't really do it justice.

It needed some lovin' with paint and wood filler. 

Home Depot

This was the first time working with wood filler and let me tell you... best. thing. ever.

Using the left over paint and primer from this chest makeover, I freshened it up. I was really  not loving the plastic Ikea handles so I replaced them with glass knobs which I got from Home Depot for about $4 each.

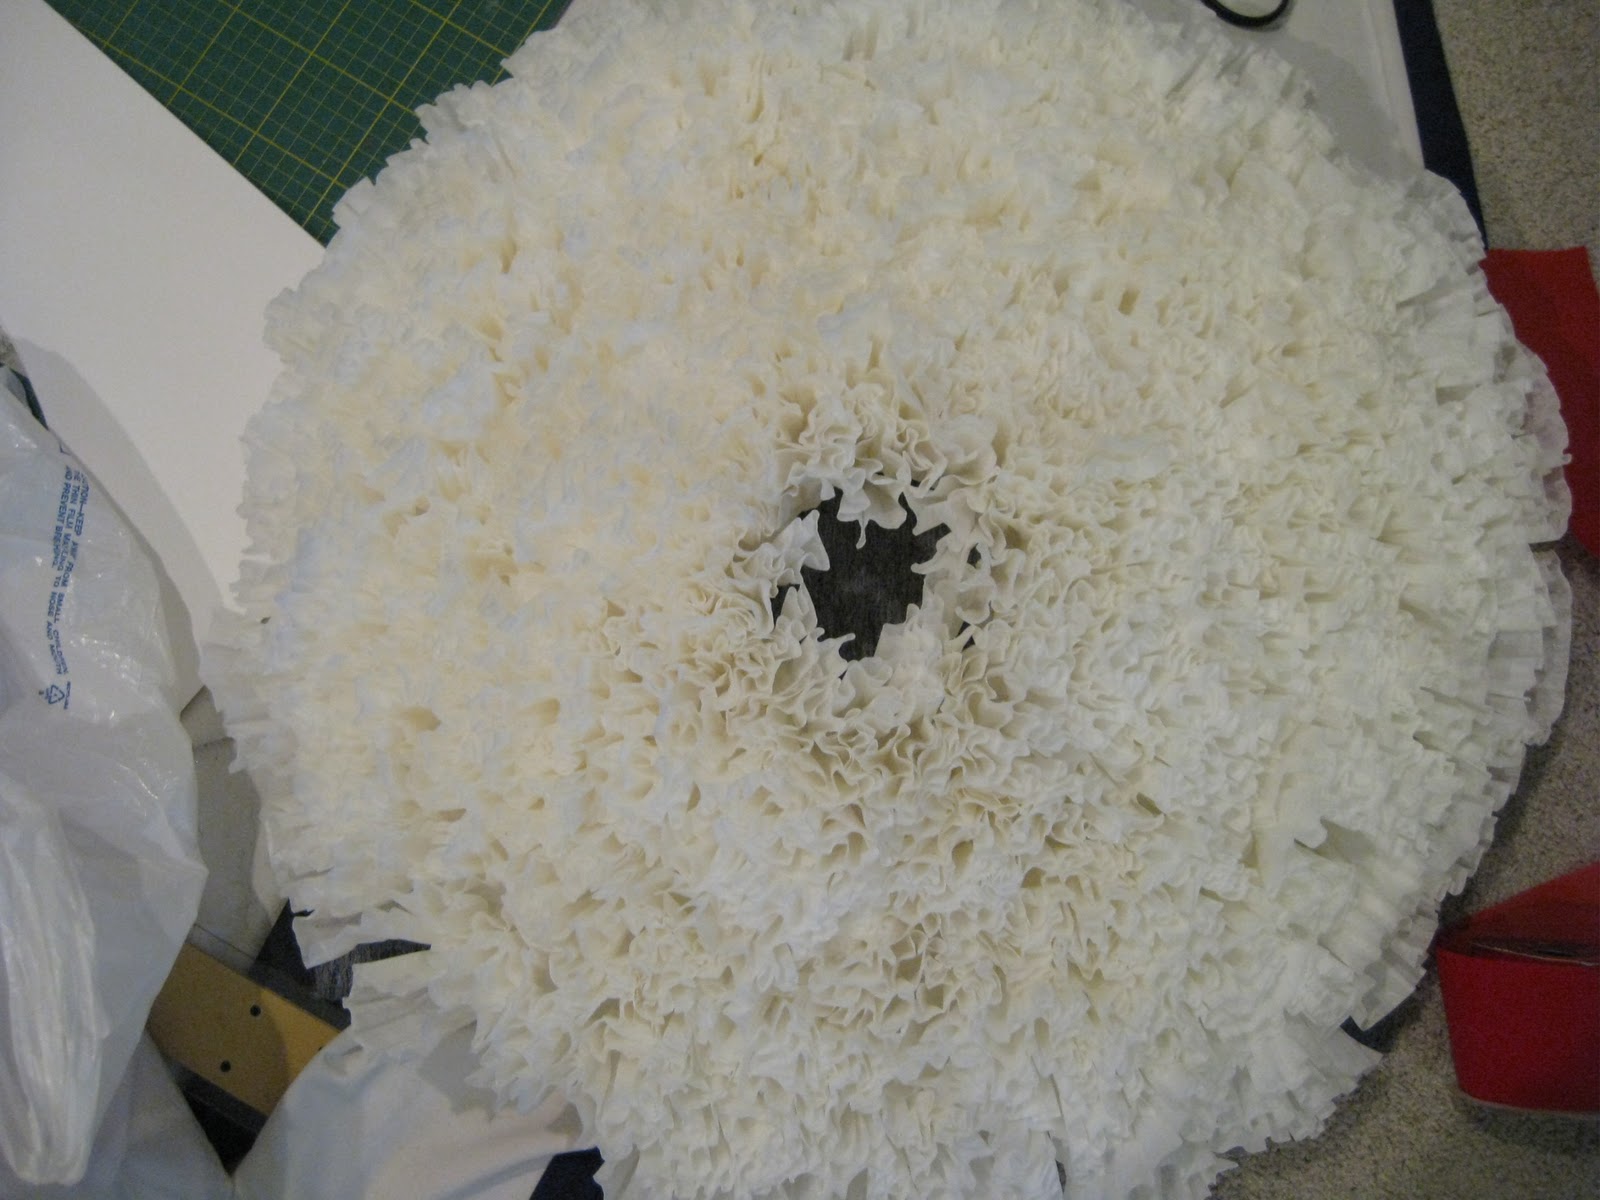
Next I was on the hunt for something circular... I was thinking of using these Ikea mats 

Ikea
The colour wasn't quite right but as a last resort, I was going to paint it grey. Or yellow. I kept going back and forth on the colour scheme.

One day I happened upon a new dollar store in my neighbourhood. I love perusing through aisles at dollar stores... 

Then out of the corner of my eye, on the very bottom shelf in the corner, I saw these place mats:


Yes, they are place mats. They came in a set of 4, WITH smaller orange slices to be used as coasters. 

Perfect!

All I had to do was trim the greenery and paint them. 

I decided to go with grey because this cabinet was going to put where the closet used to be. We took off the closet doors to make the room larger. In doing so, we were exposing the existing wallpaper which we didn't deem worth the time, money or effort to get rid of. It was in decent condition and at least it was blue and white...

I love spray paint because it's just so easy. Sometimes though you can get ugly drips and an even spray. This actually happens to be more than I like to admit. Mainly due to the fact that I'm so impatient and I don't give the paint enough time to dry between coats. And ... maybe also because I have a heavy hand when it comes spraying on each coat...

With some spray glue, the circles were in place! 

Next came the letters which I got at the dollar store. I used to buy these at Michael's for about $4 each! I recently was at Michael's and noticed the wooden letters are on sale for $1.49. Not bad.

I wish the spray paint was a brighter yellow but that's the problem with spray paint- you're quite limited with colours. 

The letters are attached with velcro so baby can interchange the letters or we can change them with numbers OR we can put her name on it: Mia. 

Life: Designed
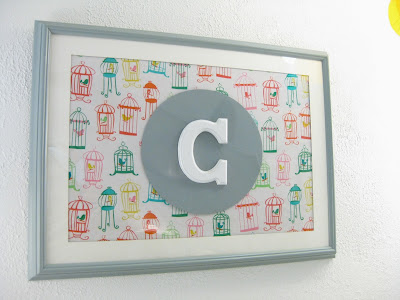
Remember I said the place mats came in a pack of 4? Well I didn't want to throw it away so I used it for this frame:

Life: Designed

I got this frame from a thrift store for a couple bucks. I cut out the mat board and used fabric I had left over from making pillows. The glass that the frame came with was permanently dirty... I tried everything and it was if the dirt or marker or whatever it was had seeped into the glass. It wasn't budging. 

So I got a sheet of mylar from the art store and cut it to size. Good enough. 

Then I added the painted letter on top. Since a name hadn't been decided on, I used their last name initial. Now that she has arrived and we have her name, I'll have to change the C to an M!

Life: Designed

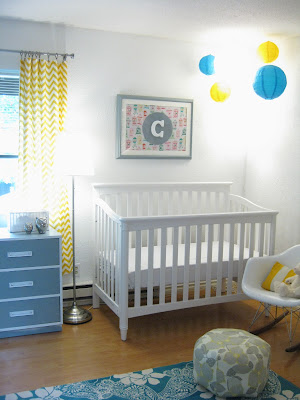
PS. See those drapes? I sewed those! Granted they're nothing fancy but coming from a girl who's sewing projects in 10th grade home economics all fell apart.. this is quite the accomplishment! =)

Thanks for reading! I'm not done on this nursery just yet... some more DIY to come!

Wednesday, December 28, 2011

I Love Louis Vuitton.... Ads

Although I like the shape of some LV bags I'm just not really a fan of their lines. BUT I absolutely love their ads- the ones shot by Annie Leibovitz. This lady is a genius. 

I could care less that they are Louis Vuitton ads. Artistically speaking, I think these images are breath taking. 


Tuesday, December 27, 2011

Knitted Scarves

This Christmas my mom knitted my dad a scarf. 
She's currently filling out an order for each of my sisters. Honestly, I'm not a huge fan of knitted scarves but I found this somewhere online. 


I love it! 


What else is out there in the world of knitted scarves?

This one is very ascot like:


Etsy
I like it better on the side:

  
Etsy
I love buttons...


The versatility of this one is great!

  
Etsy
Etsy
I could live in this one....

Source
Maybe I'll put in an order with mommy dearest afterall....


Toy Chest Transformation

Yesterday I posted this nursery project I completed this summer. My best buy in regards to budget was hands down, this toy chest.

Life: Designed
I came across this lovely piece at a local thrift store and was stopped dead in my tracks. It was exactly what I was looking for! Price wise, it was really reasonable at $30. Solid Wood. PERFECT condition. Even the key was taped to the bottom of the chest. I couldn't believe it. I was all ready to buy it when I saw a sign. "50% off everything in store". The sign was for tomorrow only.

Dilemma. 

Do I risk it? 

It was a couple hours until closing. What were the chances this would sell by tomorrow?

So with a bit of anxiety I left empty handed. 

The next morning, first thing I headed to the store. I enlisted the help of my dad because this thing was heavy. Besides, I needed him to claim it while I shopped around for more goodies. 

The store was supposed to open at 9am. I got there right at 9 and the doors were already open! I panicked and ran inside leaving my dad behind in the parking lot. 


Thankfully the chest was still there- just waiting for me to arrive.

My dad finally found me and stood guard while I hunted for other deals. He said while I was gone, he got multiple offers on it. One even offered to pay him double the price. No thank you! This baby's mine.
When I took it home, my mom was horrified that I wanted to paint it. I was a bit apprehensive too because it was just in such great condition. But I got over it pretty quickly. 

I bought a quart of paint and primer in one at Home Depot. I'm a little too lazy to prime, wait for it to dry and then paint. This seemed like a reasonable time saver. It worked out just fine.

Home Depot
I didn't even sand the chest first (tsk tsk.. I know). Here it is after one coat of paint and a coat of spray paint. I found the paint brush was creating unsightly brush strokes. I hear it's important to use a high end brush to avoid these strokes. One day when I invest in an expensive brush, I'll let you know how it goes.

Life: Designed
I wasn't too worried about the panels because I had plans for those areas that didn't require good coverage.

I got some foam from a local foam shop for about $17. Fabric was purchased from Fabric.com which was used to cover the foam as well as some foam core for the panels.


Life: Designed
It bothers me that the circles on the panels don't line up with each other... I actually did make an attempt to make them line up. I'm not sure what happened there... Maybe one day I'll fix it.

Side Note: I love that duck pillow. It's amazingly soft! I want one just to snuggle up with it. I found it by chance at Winner's for $20. The baby's going to love drooling all over that thing!


I also love the birdcage fabric (also from Fabric.com, pillow inserts from Ikea).

So to total it all up:

Chest: $15
Foam: $17
Fabric: $8    

Total:   $40

That's pretty amazing if you ask me!

Monday, December 26, 2011

The DIY Nursery Project

This past summer, I converted a spare room into a nursery for my sister's baby. Check it out on Project Nursery!


Taking on this project was a lot of work but so much fun! I love DIY projects but a word of caution: you need A LOT of patience and spare time! Luckily I was on summer vacation so all I had was time.. Patience is something I'm working on. =)

Life: Designed
 
Since my sister and brother in law were not finding out the sex of the baby, I had to keep it gender neutral. Seeking something bright and fresh with pops of colour, I came up with this "mood board". 

Life: Designed

For the most part, decorating is not cheap...especially when starting from scratch. All the little things add up. Fast. The pieces in the mood board add up to about $700. And that's NOT including the crib which my parents were gifting to them. (And of course not including labour or design fees).

My sister and brother in law came back to me with a budget of $300. This was going to be tricky...

First to go was paint. Even though paint is one of the cheapest ways to decorate a room, their walls were textured and would require a lot more paint, not to mention a lot of work. Besides, a white room is just fine with me. 

I then went hunting. Online for the best deals, thrift stores for items I could refinish and lastly my parents home for furniture. My mom is something of a hoarder...

Even with these changes a budget of $300 was proving to be impossible... Average rocking chairs alone are about $300.

Thankfully my dad offered to buy the rocking chair for them. I love Eames furniture...one day I hope to afford originals rather than knock offs. We got ours for a really good price at NOOD.

My sister's friend kindly gave us $100 for the room which allowed us to afford this!
I love the knitted grey pouf from CB2 but my sister wasn't fond of it. The Etsy cover is removable and washable so it's more practical than the knitted pouf.


Other items are from Ikea and Fabric.com. 

Overall, I'm quite pleased (and relieved) at the outcome. It's not too babyish so hopefully the baby will love it for years to come!


*Update* Links:  Toy Chest Transformation, ABC Storage Cabinet, Frames, Change Table


Life: Designed
Life: Designed
Life: Designed
Life: Designed

Sunday, December 25, 2011

DIY Coffee Filter Wreath

Merry Christmas Everyone! It's a little late but I just wanted to share my first attempt at a DIY wreath. 

I was at my sister's house a couple weeks ago and my brother in law mentioned he wanted to put a wreath over the mantle. I'm on break from school and the thing I love to do most with my free time next to playing with my nephews and niece, is a DIY project!

Searching the internet I came across coffee filter wreaths! What a great idea! And right up my alley budget wise!

I hit up a few stores looking for a styrofoam wreath to use as the base. I found them at Michael's but they were not cheap. For this little project, I was hoping to find the base for a couple dollars. No such luck.

So then I decided to just try it with poster board. It should work right?

I cut out a donut shape and started hot gluing on the filters which I bought at a dollar store. 

Life: Designed
 To avoid burning fingers, use a pen to wrap the filters around:

Life: Designed
The closer you glue the filters, the fuller it will be. But try not to be too tight to begin with. I found it easier to start looser and then fill in the gaps as needed afterwards. 

Life: Designed
Be patient and just keep at it. This wreath is 19" in diameter and took about 200 filters.
Life: Designed
So now what? It didn't quite have the impact I was hoping for. Simplicity is great but this was a little too plain.

Then I came across this wreath. Simple. Elegant. Beautiful.

Lowe's
The method used for the Lowe's wreath is different from what I did. If I were to do this again, I'll probably use Lowe's way because I like the type of ruffles it produces better.

I love the green and white palette but I found a wide red velvety ribbon for only a $1 so... red it was!

For the flower portion, I used poster board and spray painted it silver, which I already had on hand. 
I took an old necklace and sacrificed it for the beads. They were the perfect shade of red.

Life: Designed
Imitation is the highest form of flattery right? 

I remember hearing once on some reality show, I think it was America's Next Top Model, something like, "If you're going to copy someone make sure you do it 100x better"

Well.. maybe I'll get it right next time. I don't think it's bad, it's just not as wonderful as I had imagined in my head.

Life: Designed